
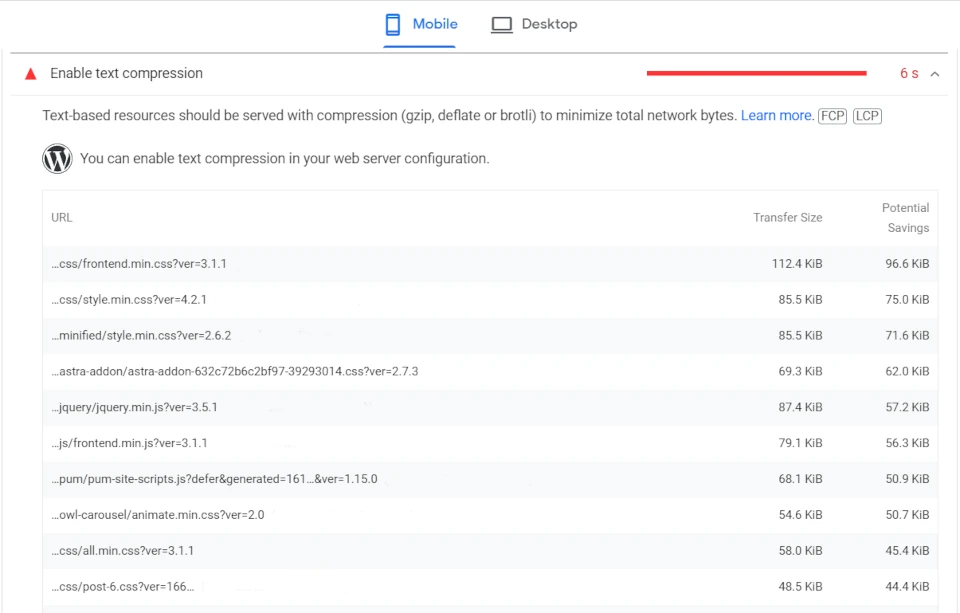
Thank you PageSpeed Insights for another opportunity, using custom font files increases our website size. Fonts are yet another file our user has to download, they are already downloading images, HTML, Java and CSS. We can enable text compression to lower the font file size, improving website speed.
Once you have solved your enable text compression opportunity, have a look at Ensure text remains visible during web font load to ensure text doesn’t appear out of nowhere.
What is text compression?
Text compression does exactly what it says on the tin, by making our font files smaller we can speed up the time it takes our user to see them.
Google will recommend we use Brotli or br compression, this isn’t available on all servers, instead we can use GZIP and enabled on most servers by default.

Don’t Want To Enable Text Compression? Use Default Fonts Instead
An extreme solution to this issue and other related font opportunities is to not use a custom font at all. By not installing a font file to use, our website will use a browsers default font (If a browser already has these fonts there is no need to download them.)
If we haven’t installed a custom WordPress font, then our users’ browsers will use the below fonts by default.
- IE – Arial, Times New Roman, Courier New
- Edge – Arial, Times New Roman, Consolas
- Firefox Windows – Arial, Times New Roman, Courier New
- Firefox Mac OS X – Helvetica, Times, Courier
- Firefox Linux – sans-serif, serif, monospace
- Chrome Windows – Arial, Times New Roman, Courier New
- Chrome Mac OS X – Helvetica, Times-Roman, Courier
- Safari Windows – Times New Roman, Courier New
- Safari Mac OS X – Times, Courier

Enable text compression (PageSpeed Insights Solutions)
Equipment
- WordPress
- W3 Total Cache
Ingredients
- 1 Website
- 1 Website
Instructions
Turn On Browser Cache
- Open W3 Total Cache Performance > General Settings
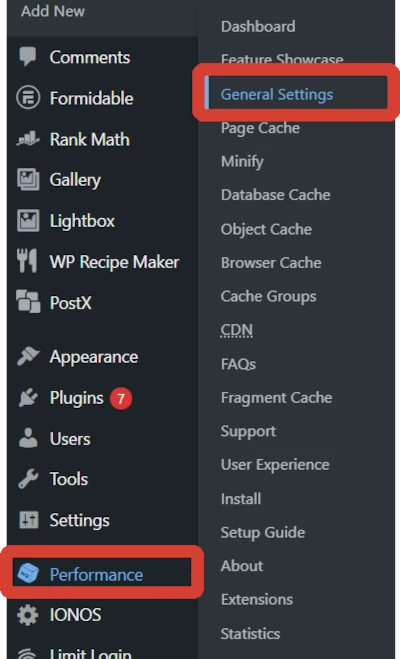
- Scroll down to the Browser Cache sectionEnable Browser Cache if not already Click Save All Settings


Enable Text Compression
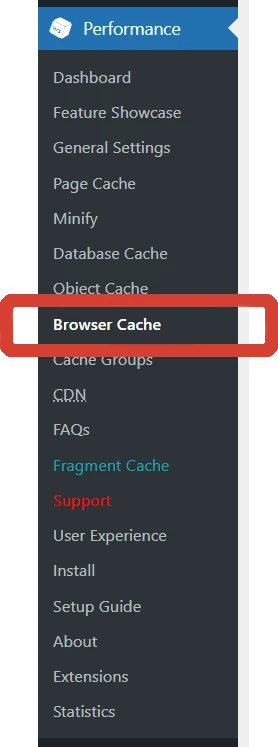
- Now that Browser Cache is enabled, we can enable text compression's in W3 Total Cache.Open W3 Total Cache Performance > Browser Cache
- Select Enable HTTP (gzip) compression
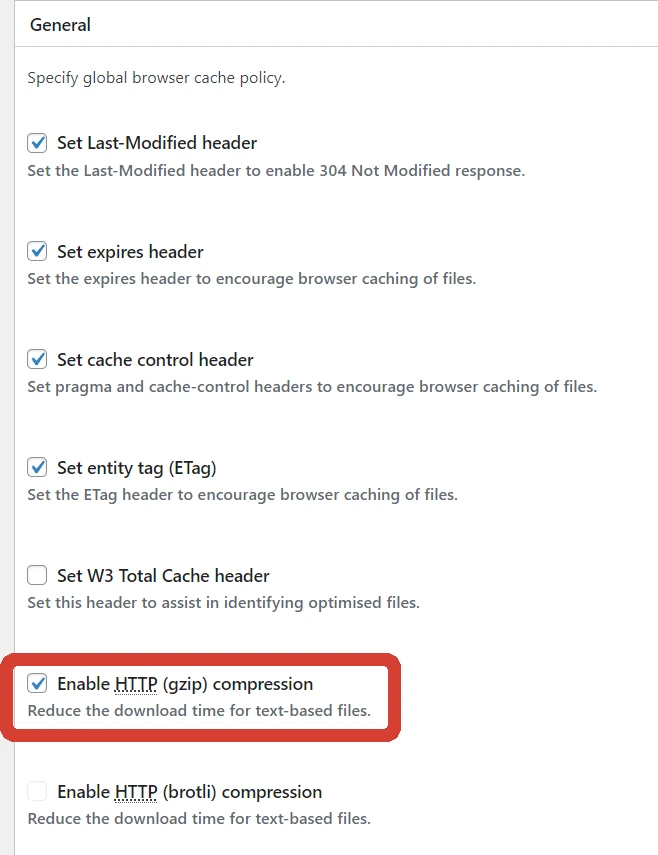
- Click Save all Settings