
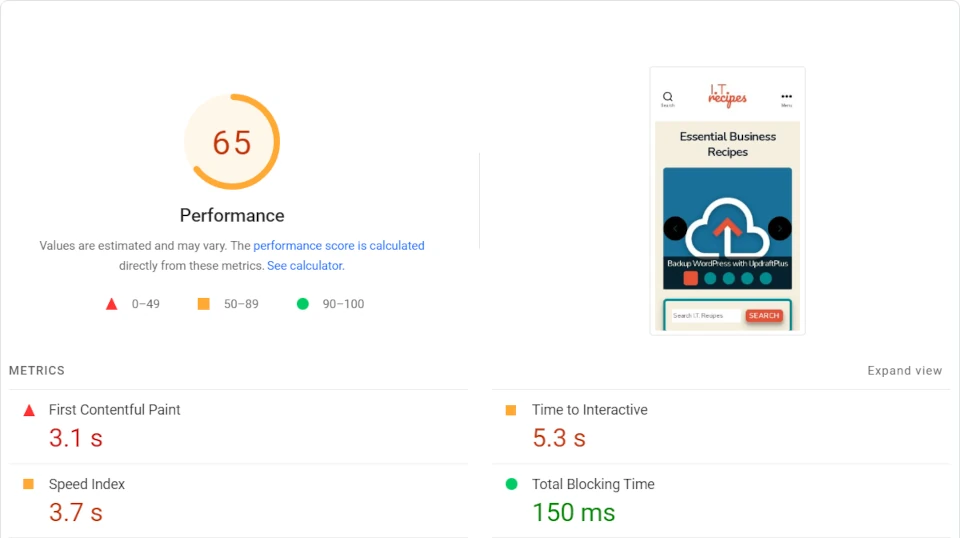
PageSpeed Insights is a tool created by Google to test our overall website performance. By typing our website address (URL) they present us with a list of opportunities and diagnostics. By focusing on these, we can improve our PageSpeed Insights score.
What is PageSpeed Insights?
From 2018 PageSpeed Insights calculates scores using Lighthouse, this is Google’s open source tool for evaluating the web.
Reports are mobile first and measure everything from image load time, image format, font load times and unused code.
These results give us some insight into how Google ranks our page, as speed is a ranking factor. It’s not the only ranking factor though, you may have the fastest website, but if the content is rubbish, then Google will know, and they will lose us on page 32 of the search results.
Perfect score
So many other factors affect your ranking that chasing a perfect score is not worth the time. It is best to have a good score, 89+, not perfect and focus on other ranking factors like content and back links. We should place focus on solving opportunities and diagnostics with red triangles towards the top.
Google will provide some links to solutions to these issues and so do we, check out our PageSpeed recipe list.
Why page speed matters
To put it simply, research has shown that if a website takes over 3 seconds to load, 53% of visitors will leave. This leave rate goes up with every extra second. I.T. Recipes want you to stay (please stay) so we have put some focus on page speed from the beginning.
Our website’s code and design is only half the battle, our host is also going to affect our page speed as well. Do your research on hosts; it’s the only proper way of knowing.
Alternatives
Google makes PageSpeed Insights for Google. Though any speed improvement will help us rank higher on Bing or Yahoo, they may look for something slightly different.
- Measure – Another Google made service, uses lighthouse (Lab tests only) plus tests basic SEO and Accessibility.
- YSlow – Yahoo’s version of PageSpeed Insights
- GTMetric – 3rd Party, combines Lighthouse and YSlow
- Pingdom – 3rd Party
We are going to use W3 Total Cache to improve our PageSpeed Insights score. This plugin will help us tackle the following opportunities presented by PageSpeed Insights.
- Eliminate render-blocking resources
- Serve images in next-gen formats
- Minify CSS
- Minify JavaScript
- Serve static assets with an efficient cache policy
Please follow our WordPress Backup recipe before cooking
How to improve your Google PageSpeed Insights score with W3 Total Cache
Equipment
- WordPress
- W3 Total Cache
Ingredients
- Website
- Website
Instructions
Serve static assets with an efficient cache policy
- Install and activate W3 Total Cache, Once installed, open Performance > Dashboard, this will start up W3 Total Caches setup. Test each section then press next in the lower right corner. Once complete this plugin will auto start a basic cache. There's no need to do anything.
Minify CSS & JavaScript
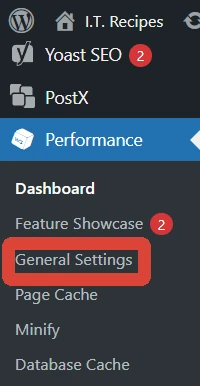
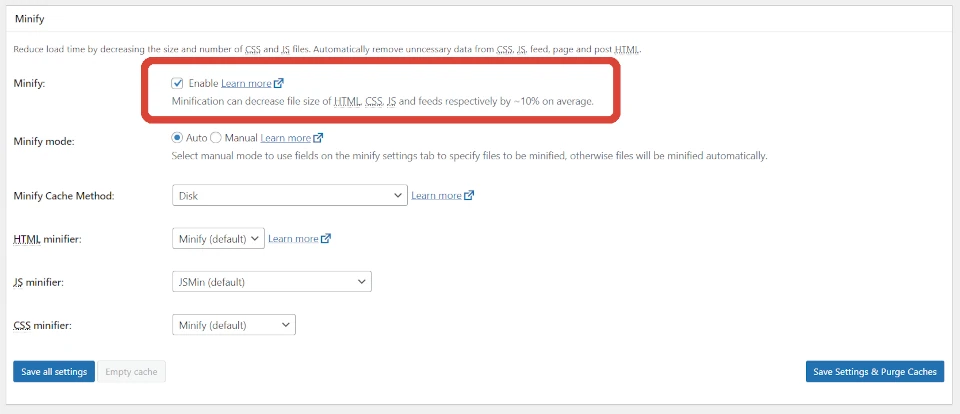
- Activate MinifyIn your WordPress Dashboard in the lower right of the main menu, press Performance > General Settings
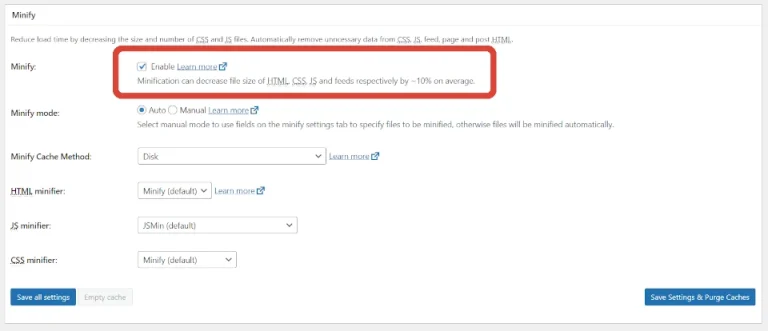
- Under the Minify heading tick Enable, then press the blue Save all settings button.
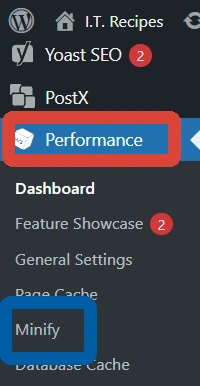
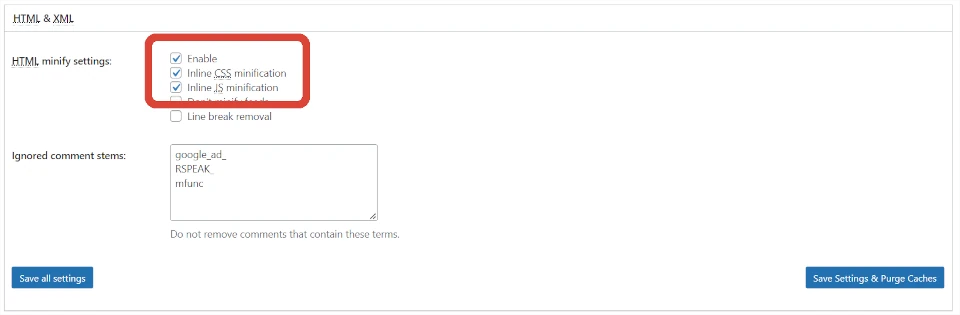
- MinificationIn your WordPress Dashboard in the lower right of the main menu, press Performance > Minify
- By default JS (JavaScript) and CSS are enabledWe will enable HTML plus inline CSS and JS. Under the HTML & XML heading tick Enable, Inline CSS minification, and Inline JS minification.

- Press Save Settings and Purge Caches

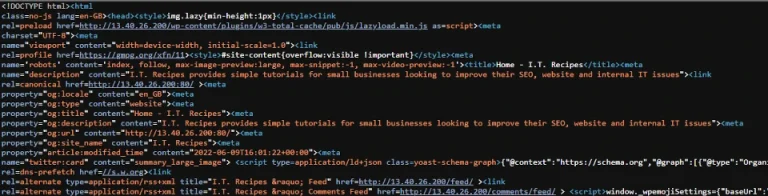
- Testing MinifyMinify doesn't work for currently logged users, so to test open your website in a Private Window, right click and press View page source
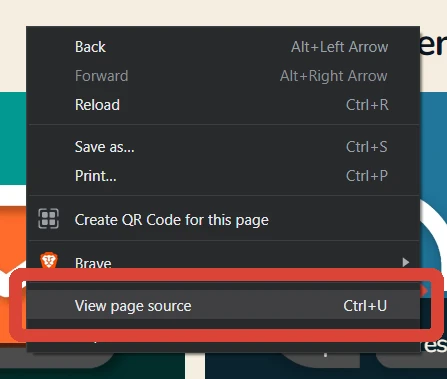
- You will see your code looks very different

Defer offscreen images
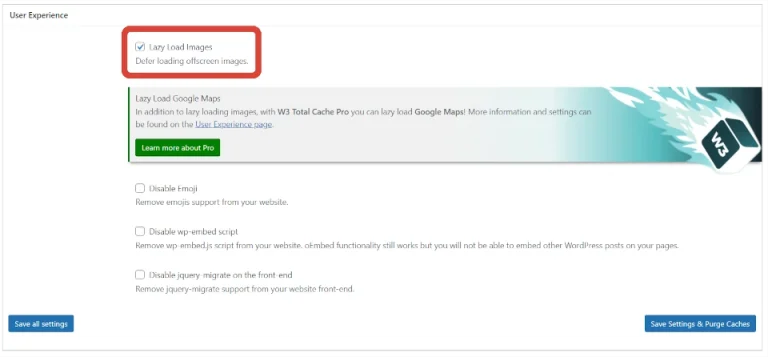
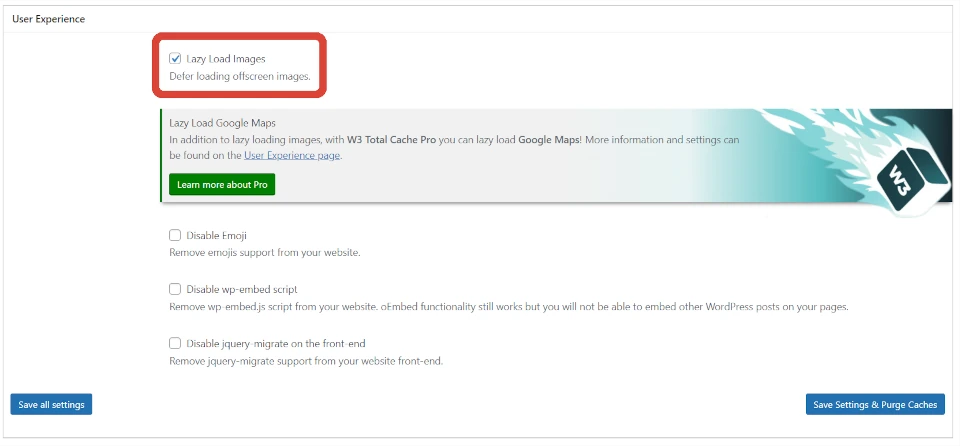
- In your WordPress Dashboard in the lower right of the main menu, press Performance > General Settings
- Under User Experience tick the Lazy Load Images box, then press the blue Save all settings button.
Disable Emojis
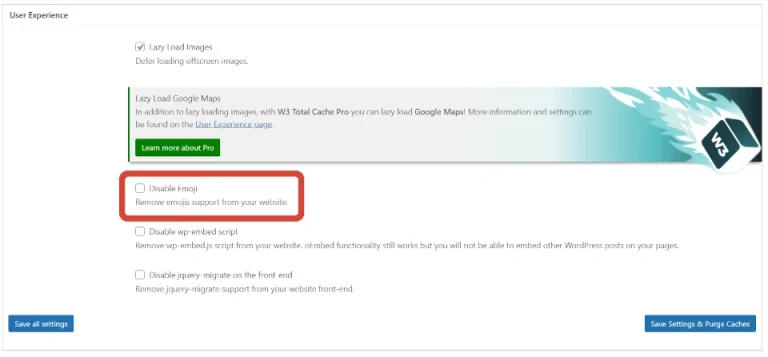
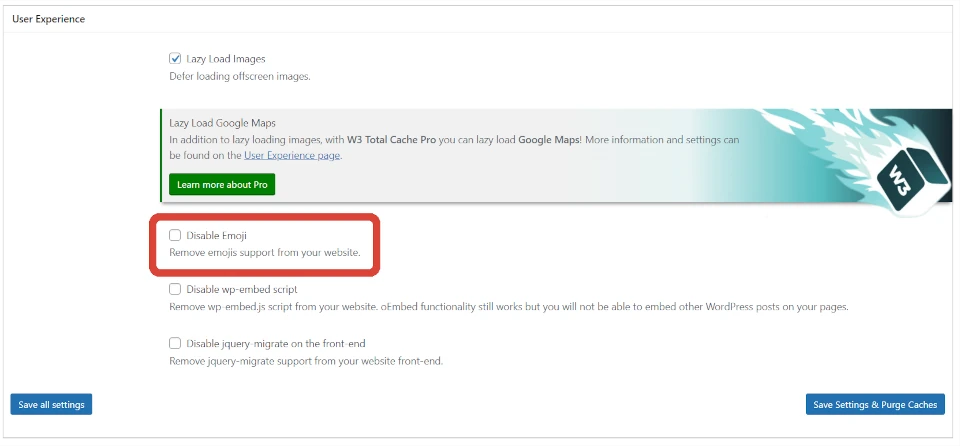
- In your WordPress Dashboard in the lower right of the main menu, press Performance > General Settings
- Under User Experience tick the Disable Emoji box then press the blue Save all settings button.
Serve images in next-gen formats
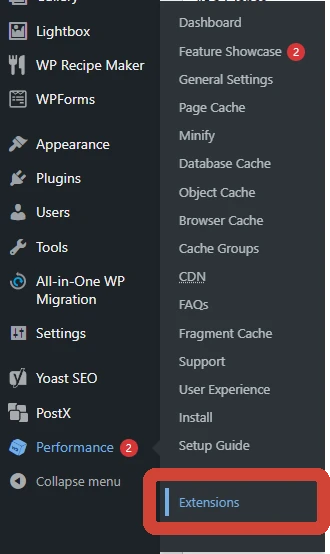
- Activate W3 Total Cache's image serviceIn your WordPress Dashboard in the lower right of the main menu, press Performance > Extensions
- Locate Image Service and press Activate

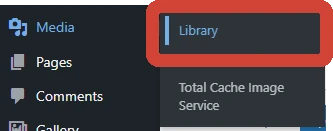
- Before we covert ALL images we will test 1 or 2 just in case.Open your WordPress Media Library.
- Next to each image we can press Convert.Once complete test the page these images are situated on to be on the safe side.

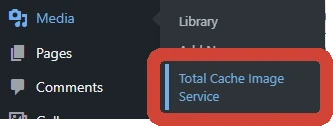
- Once happy we can convert all images with one button.Under the Media menu press Total Cache Image Service
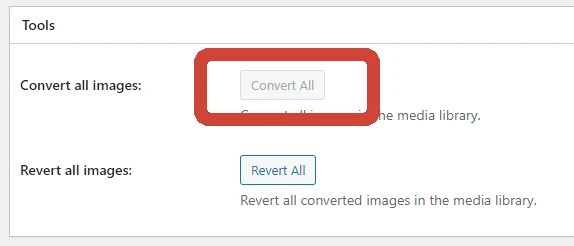
- Under the heading Tools, press Convert All


Struggling with the above recipe? Hire a chef to do it for you